
Salmon
Learn to Make Durable Bait: For Bobber & Egg Fishing

By: Big Duane Inglin
It’s salmon season on the West Coast and many anglers will be using a bobber and eggs to catch fish. Properly cured and well-scented eggs can entice even the most finicky of biters. In this blog I’m going to focus on how to cure the perfect piece of roe for bobber and egg fishing. I want this roe to be durable, last for several cast and milk out a great scent trail. Let’s focus on how to do this.

Success begins with good eggs. Mature Chinook and coho have mature eggs, which are best for curing. Meanwhile, a issue some anglers have with these eggs is they often are loose, meaning the skin on the skein has begun to break down. The individual eggs may come off the skein easier. This is normal. These are spawning salmon. Naturally their eggs loosen after they enter the river.

It’s important to remove any remaining blood from skeins. Even if you take good care of your catch in the field and bleed your fish after harvest there is usually a little blood left in the veins of the skeins. It’s easy to move the blood along the vein with the flat edge of a knife or scissors and simply push the blood into a paper towel where it is absorbed.
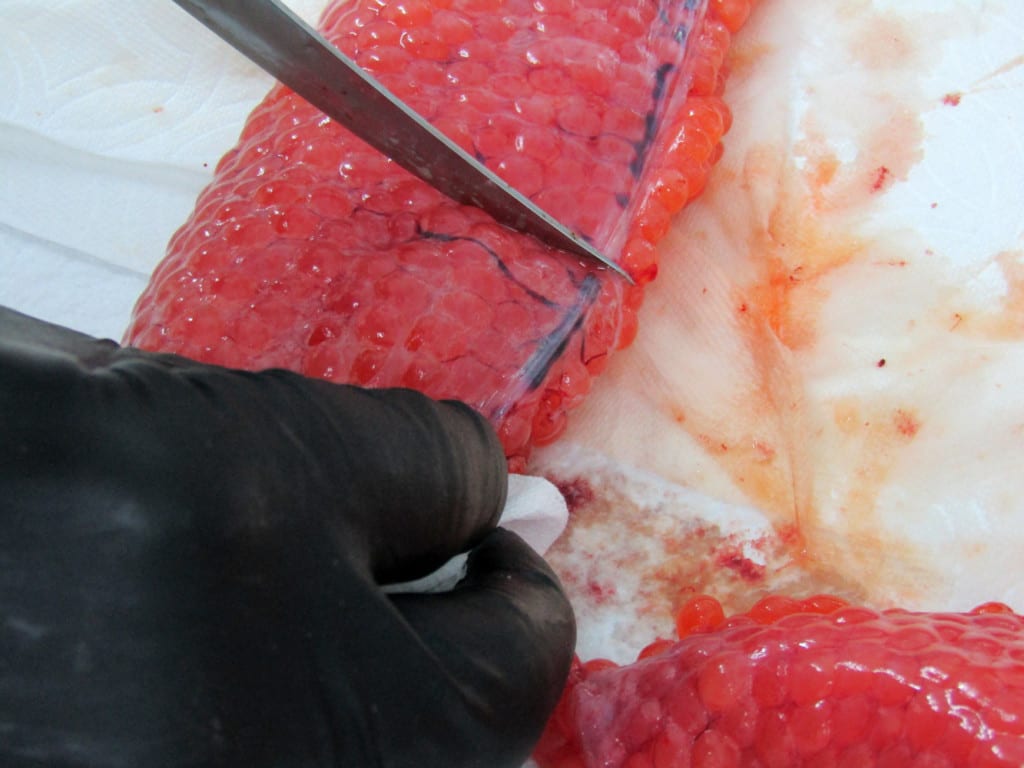
Because mature fall salmon typically have good size skeins you’ll want to cut them into manageable six-inch pieces. A sharp fillet knife does a nice job cutting through the skein and not destroying a lot of eggs.

The sharp knife allows you to butterfly your eggs open. This allows the cure to penetrate through the skein.

Sulfite based cures are proven bite stimulators for salmon. The only drawback to sulfite-based cures is they could soften the eggs. If you have mature salmon roe and the eggs are already somewhat loose a heavy sulfite cure may create soft bait. Soft or loose bait catches fish, but you’ll go through a lot of bait.
The following recipe creates durable eggs that have good scent, vibrant color and the right amount of sulfites and bite stimulants.
Mix the following:
*Full container of Red BorX O Fire
*½ cup sugar
*1 heaping table spoon of Fire Power (krill powder)
*1 heaping table spoon of sodium sulfite
After curing some eggs, the majority of this cure should fit back into the original container. Don’t throw it away.
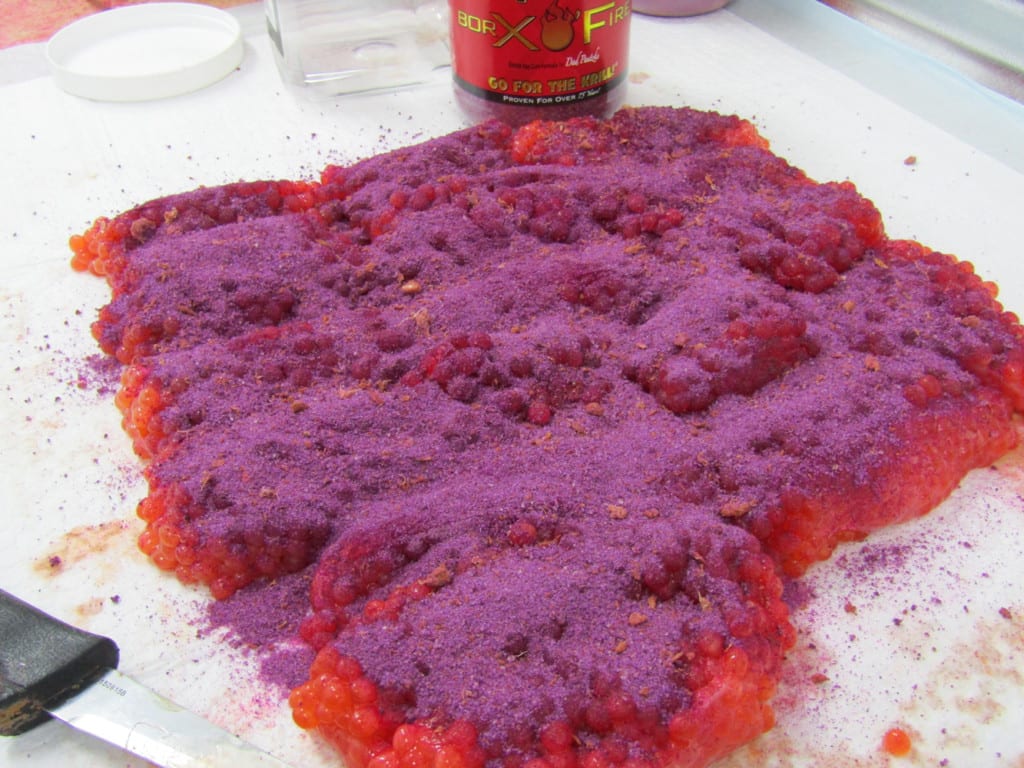
Now that your eggs and cure are ready it’s time to cure the eggs. Lay your prepped skeins on a table, egg side up and skin side down. I prep and cure eggs on Puppy Trainer Pee Pads. They keep your work area clean, make for easy cleanup and are reasonably priced.
Sprinkle a liberal amount of the mixed BorX O Fire onto your eggs. Remember, this cure is a low sulfite-based cure. Over-curing or burning your eggs is not an issue. Also keep in mind you are just coating the egg side, not both sides.
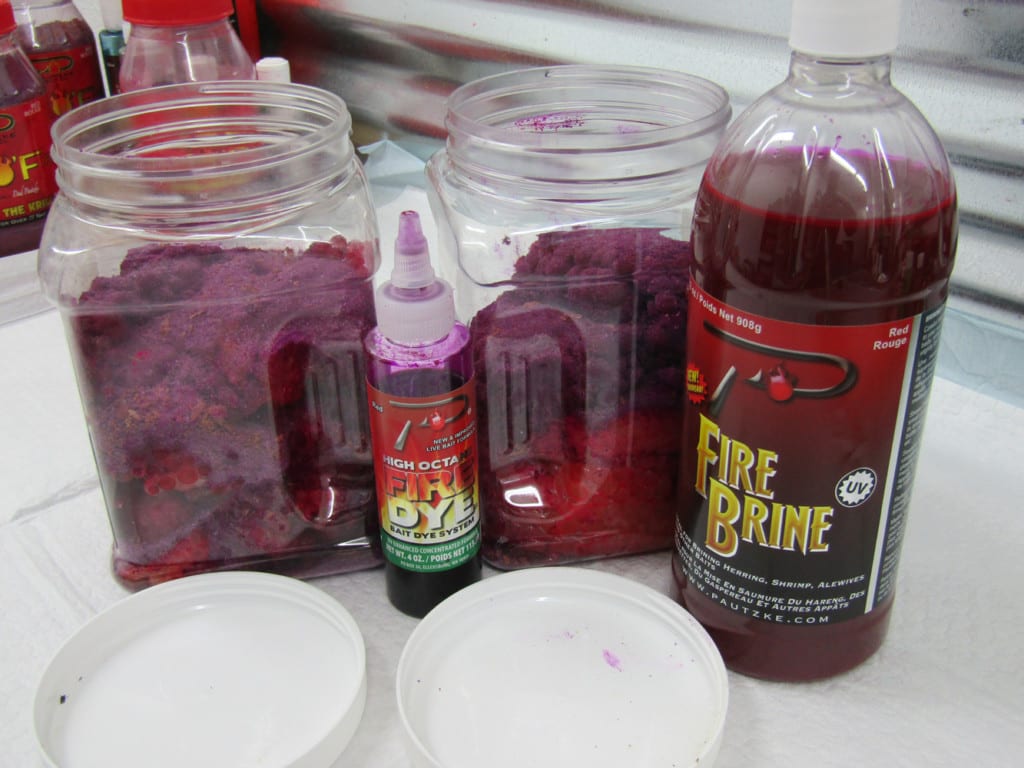
Place the skeins into a container with a screw down or snap tight lid (more on that in a minute). Fill the container about three-fourths full. Leave room for liquid and so that the eggs can move when you mix/gently tumble the container. Once your eggs are in the container, you can sprinkle a little more cure on top of them.
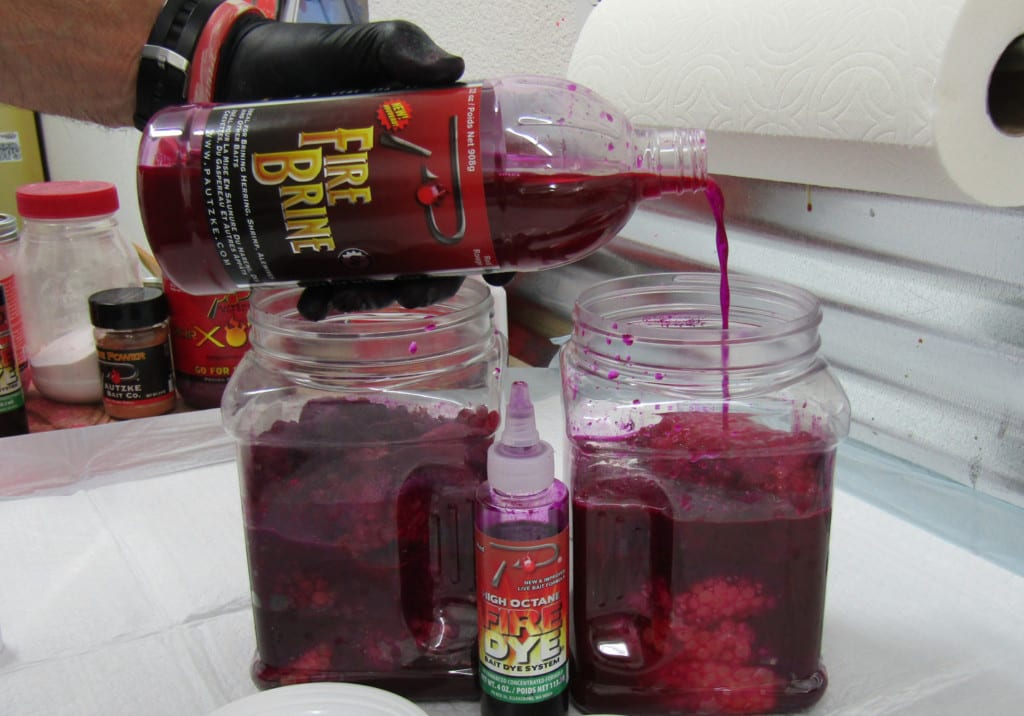
Pour in Red Fire Brine. Pour in enough to ensure the eggs are covered at the top of your container by about an inch or two of liquid.

Add in one tablespoon of Red Fire Dye. This creates a deep, dark red egg that holds color well.

Screw or snap on your lid and gently tumble the container back and fourth mixing all the ingredients. Make sure to use a container that doesn’t leak. The dye properties potentially stain whatever it comes in contact with.
Leave your eggs in the cure at room temperature for 12-18 hours. For the first several hours gently tumble the container at least once per hour. This ensures that all the eggs cure evenly.

Once the eggs are cured take them out of the liquid and place them in a colander or strainer. Allow the eggs to drain for a couple hours. This allows the extra liquid to drain off the eggs.

Notice once the eggs are removed from the container there is not much liquid remaining. Between the two containers we used one full bottle of Fire Brine (a half bottle in each) and eight skeins.
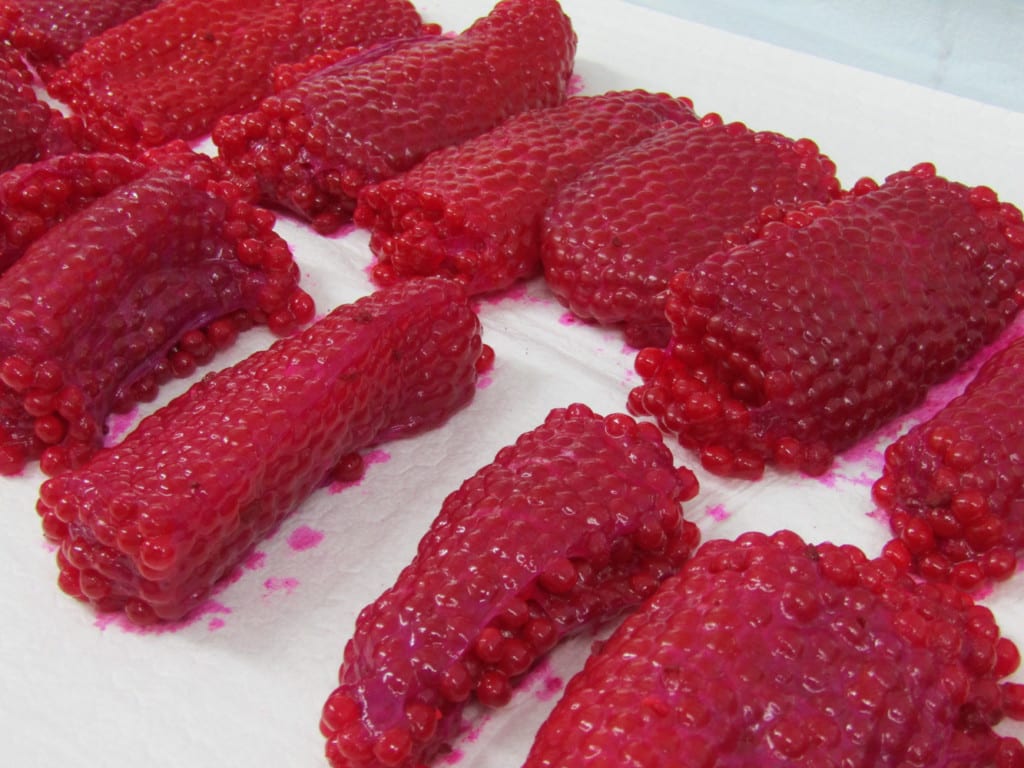
After the eggs have strained for a couple hours place them on paper-towels or puppy trainer pee pads for two hours at room temperature. This ensures all excess liquid drains out of the skeins.

Place the skeins into paper-towel lined containers. Layer the skeins in-between paper towels s and place them in the refrigerator (with no lid) for 12-24 hours. This cooling time is important. It’s when the eggs firm and tighten up.
Once firm the eggs are ready to fish or freeze. This process is lengthy. However, produces durable bait that catches fish. Give it a try and you’ll catch more salmon.

Editor’s Note: Former Pacific Northwest radio host Duane Inglin lives in the Bait Lab. He hopes to return to the fishing radio scene soon.