
Salmon
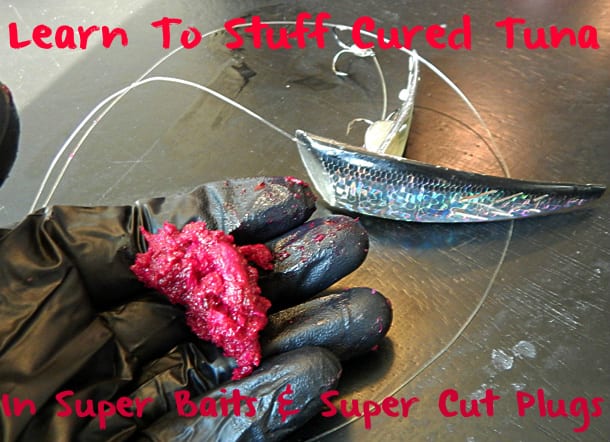
Learn To Stuff Cured Tuna in Super Baits/Super Cut Plugs
By: TJ Hester
Trolling herring for salmon is one of the oldest tricks in the book and also one of the most effective. While running straight herring is popular, and always will be, there are alternatives that are getting play, too. Personally, I run Brad’s Super Bait and Super Cut Plugs and have been doing exceptionally well on salmon. This is a technique that can be used in Alaska, California, the Pacific Northwest and the Great Lakes.
There are advantages to running plugs. You can put the plug down and it’s always spinning. It’s cheaper and doesn’t blow blow out like herring that isn’t brined properly can, and if you get short bit and the herring falls out you have to recheck your bait. With these plugs, you don’t.
You’ll never get bit less than herring with Super Baits. However, oftentimes you’ll get bit more. Running these plugs combines the action of cut plug herring with extra scent. Many scents can be packed into the plug. I’ve been adding cured tuna exclusively this season and want share exactly what I’m doing. Keep in mind, tuna in a can falls out easily. On the other hand, if you cure it, it packs better and stays more firm and dense.
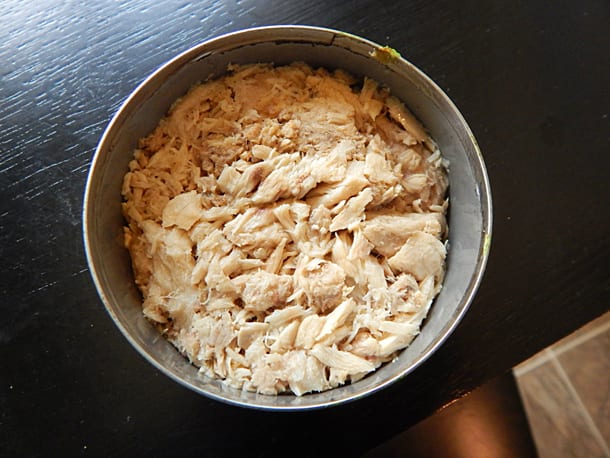
My cure is really simple. The base consists of Chicken of the Sea tuna (in oil). I use the can to measure the contents that go inside. It’s a great tool so don’t throw it out. Regardless of where you fish, if you target salmon, this is something you’ll want to try.
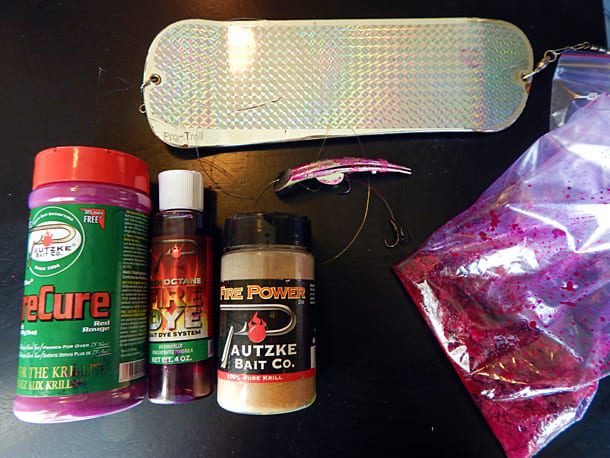
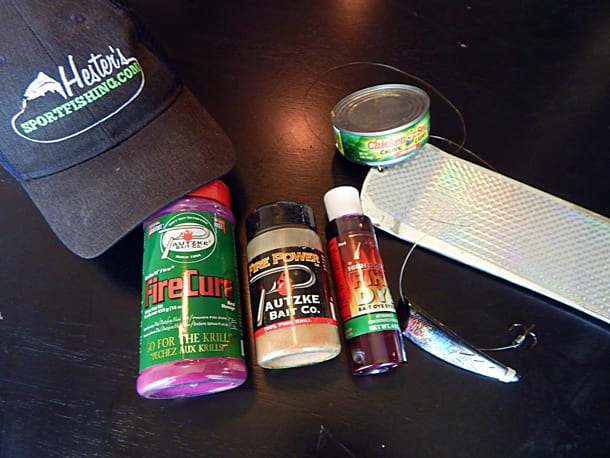
Here’s what you’ll need:
Canned Tuna
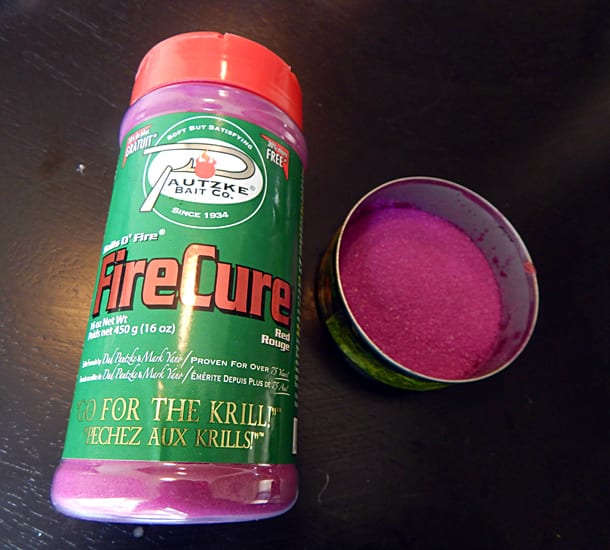
Red Fire Cure
Fire Power (krill powder)
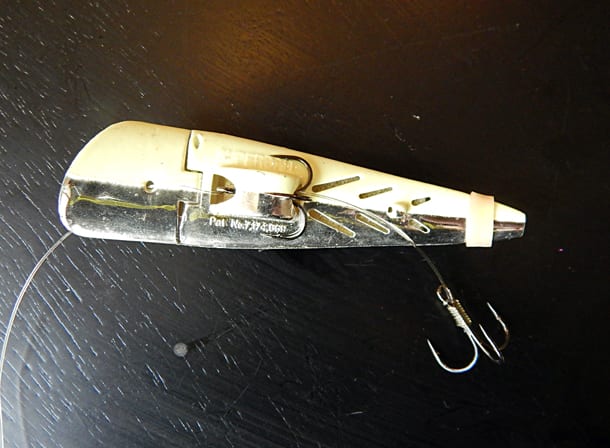
Brad’s Super Bait/Super Cut Plug
Red Fire Dye
The Salmon Have Tuna on Their Mind Cure
Step 1:
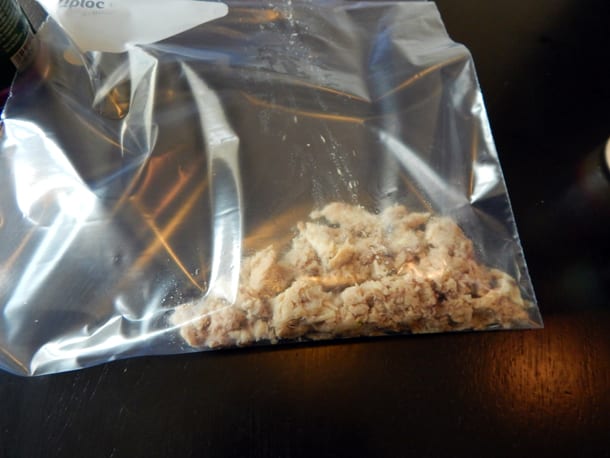
Drain all of the oil out of the can (just like your mom used to do).
Step 2:
Empty tuna into a gallon Ziploc.
Step 3:
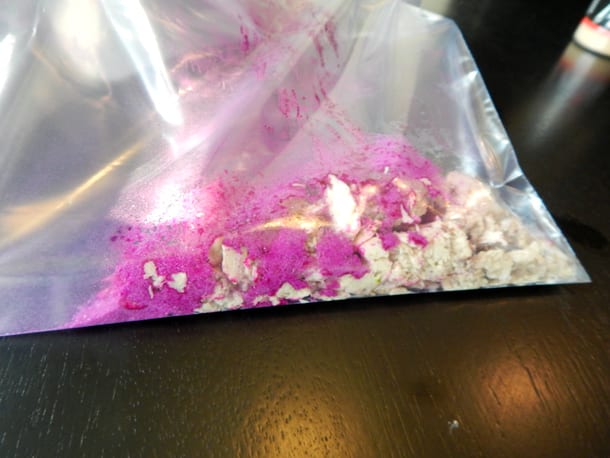
Fill ¼ of the empty tuna can with Red Fire Cure. Then dump it into the bag (with the tuna in it) and mix thoroughly.
Step 4:
After mixing, shake Fire Power into the can. Either fill up the bottom of the can so you can’t see metal anymore or simply shake into the bag.

Step 5:
Add Red Fire Dye into the bottom of the can. You only need to squirt enough to cover the bottom. That stuff is very potent. If you can’t find Fire Dye locally, Red Fire Brine will work.
Step 6:
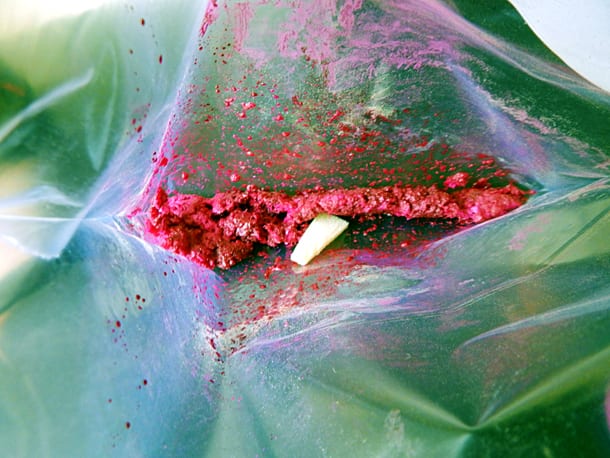
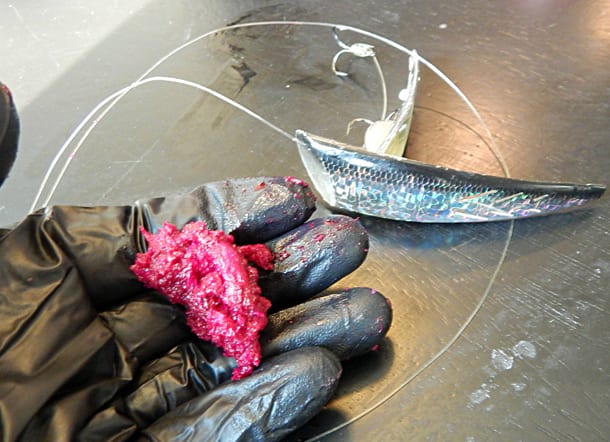
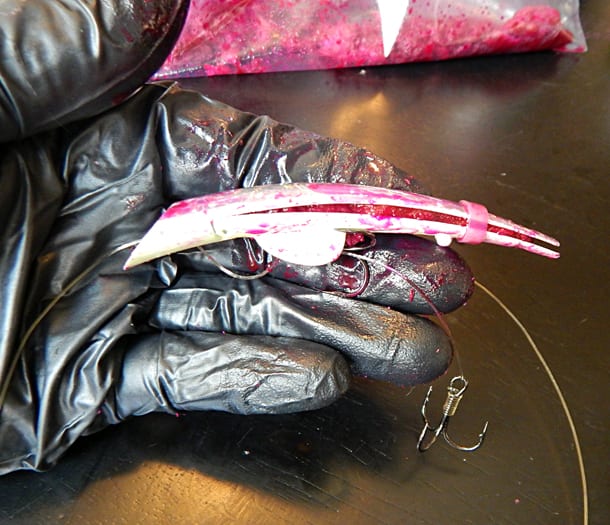
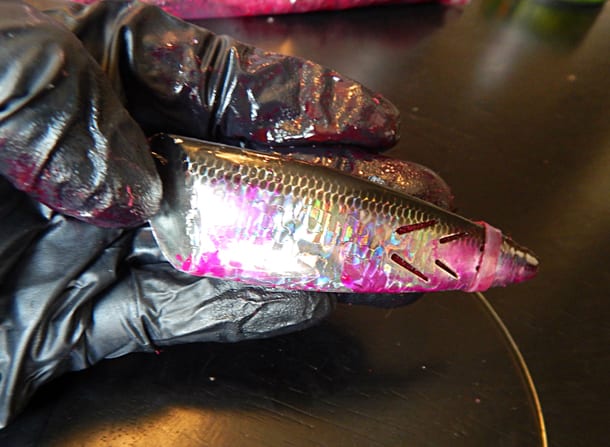
The Super Cut Plug and Super Bait is a plug that opens. It’s designed to be stuffed with bait. Pop open the hinge that opens the lure and the rubber band that holds it together. Once you open the plug notice a foam sponge inside. Place that sponge inside the Ziploc and allow it to soak with the magical scents you just created.
Step 7:
Take a pinch of the cured tuna and stuff the Super Cut Plug so it is full. But, don’t overfill.
Step 8:
Place the sponge over the bait so it holds in that aroma. If desired, you can add additional scent at this time to the sponge.
Step 9:
Close the bait, slide on the band and fish it!
I run this cure because it holds the tuna inside the bait longer and also “milks” red giving this Super Cut Plug called “BlackJack” a perfect wounded herring look that Chinook and coho (kokanee, trout and lake trout also) can’t ignore.
Editor’s Note: TJ Hester operates Hester’s Sportfishing. For more info on his guided salmon trips please visit http://www.hesterssportfishing.com/.